下面我們將為Windows Server 企業版配置網絡設置和配置Windows Update同時將啟用Windows防火牆和遠程桌面(因為使用的是虛擬機我已經使用newsidexe更新了系統的SID和更改了計算機名稱名稱為SeaDC由此可見newsidexe在windows server 種依然可以使用什麼?不知道newsidexe?呵呵去下面的地址看看去)
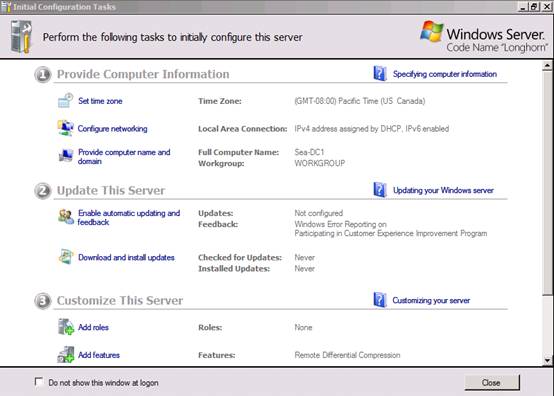
安裝好系統之後使用administrator進行登陸第一次登陸時因為administrator未設密碼所以會提示設置一個新密碼各位兄弟如果是第一次安裝Windows Server 的話不要覺得奇怪登陸以後將自動打開一個Initial Configuration Tasks如下圖()
所示
圖(
)
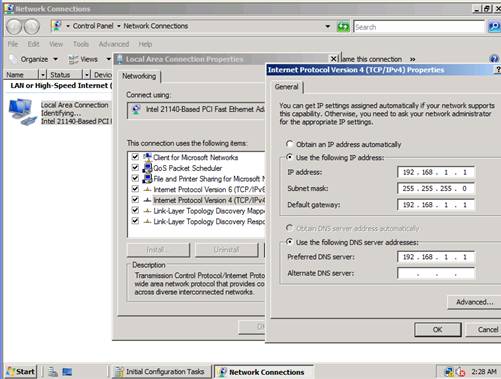
首先我們先進行網絡設置
設置如下
IP 地址 –
子網掩碼
默認網關 –
DNS服務器 –
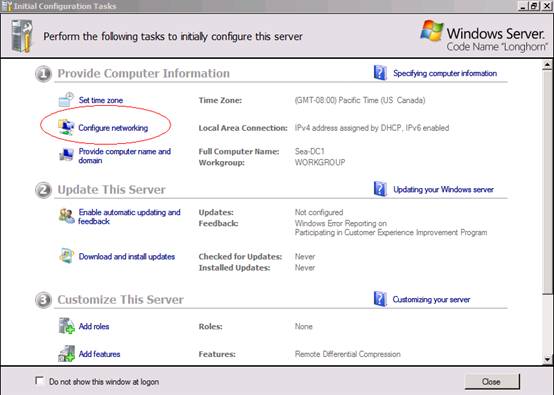
在 Provide Computer Information
點擊Configure networking
如下圖(
)所示
圖()
出現了 Network Connections 窗口然後右擊Local Area Connection 點擊 屬性接著點擊Internet Protocol Version (TCP/IPv) 再點擊 屬性 輸入對應的TCP/IP設置點擊 確定點擊 關閉如下圖()所示
圖(
)
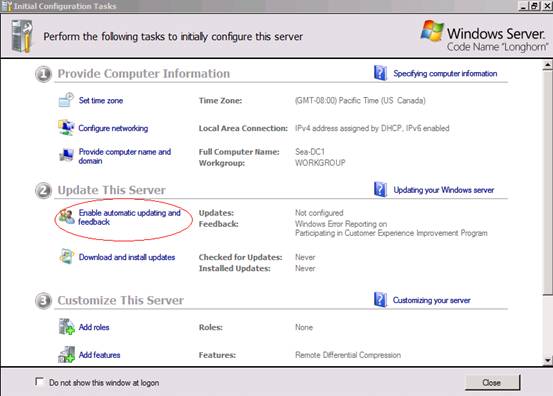
接著繼續使用
Initial Configuration Tasks
頁面配置自動更新
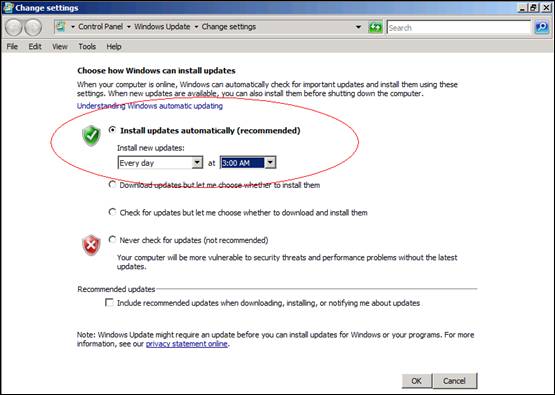
使Windows在每天早上
點開始安裝更新程序
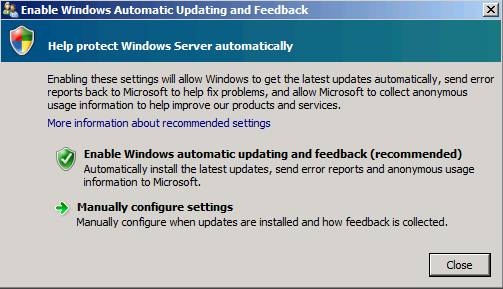
在 Update This Server
點擊Enable automatic updating and feedback
如下圖(
)所示
圖()
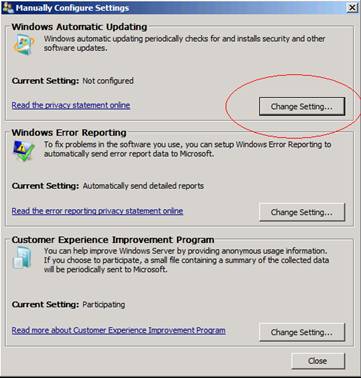
在Enable Windows Automatic Updating and Feedback選擇Manually configure settings如圖()所示
圖()
然後選擇Change Setting如圖()所示
圖(
)
點擊Install updates automatically (recommended)
選擇
AM
點擊 確定
如圖(
)所示
圖(
)
接著繼續使用
Initial Configuration Tasks
頁面啟用遠程桌面
在
the Initial Configuration Tasks
窗口
在Customize This Server下
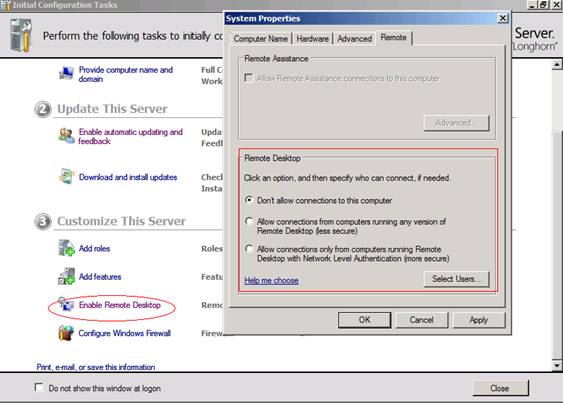
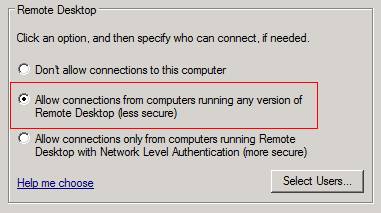
點擊Enable Remote Desktop
出現 System 屬性 對話框
如下圖(
)所示
圖(
)
選擇Allow connections from computers running any version of Remote Desktop (less secure)
如下圖(
)所示
圖(
)
因為後面會出現一個警告窗口
所以請點擊兩次 確定
最後使用
Initial Configuration Tasks
頁面配置防火牆設置
在
Initial Configuration Tasks
窗口
在Customize This Server下
點擊Configure Windows Firewall
如圖(
)所示
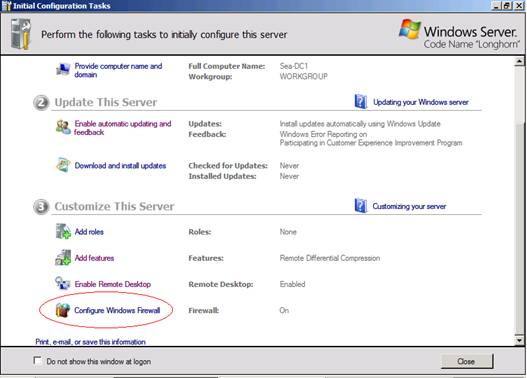
圖()
默認情況下Windows Firewall是打開的只需要設置例外即可在這裡我把File and Printer Sharing和Remote Desktop設置為例外然後點擊確定如下圖()所示
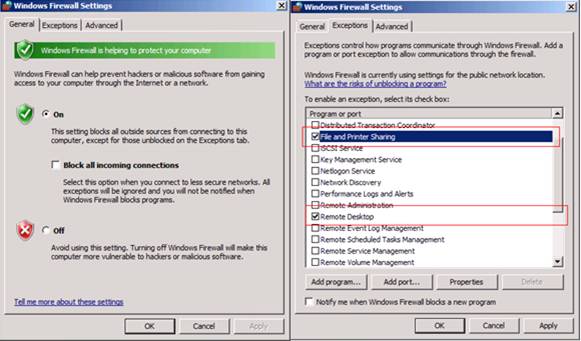
圖(
)
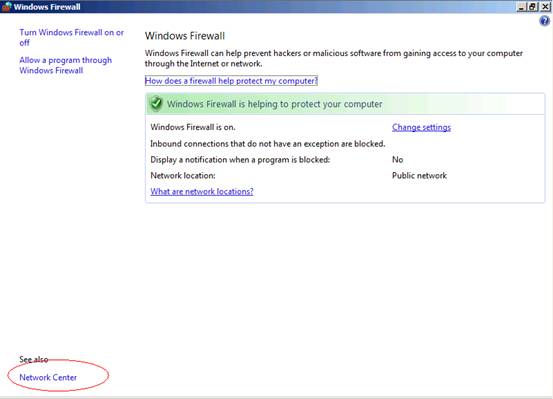
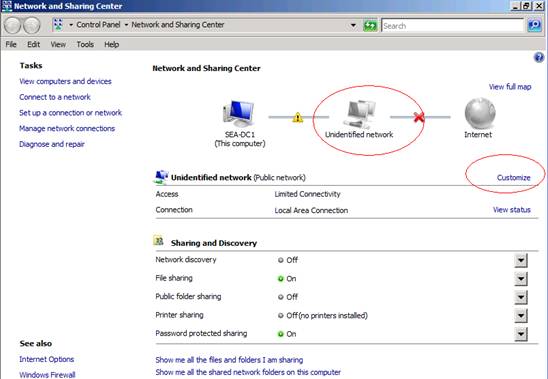
回到
Windows Firewall
設置界面
點擊
Network Center
我們將網絡位置從Unidentified network更改為 Private Network
並開啟network discovery
如下圖(
)所示
圖(
)
然後點擊
Customize
如圖(
)所示
圖(
)
此時將出現自定義網絡位置向導
將Location type設置為Private
然後點擊Next
點擊 關閉
如圖(
)所示
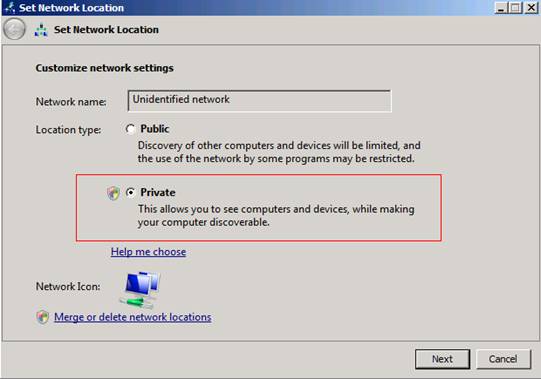
圖(
)
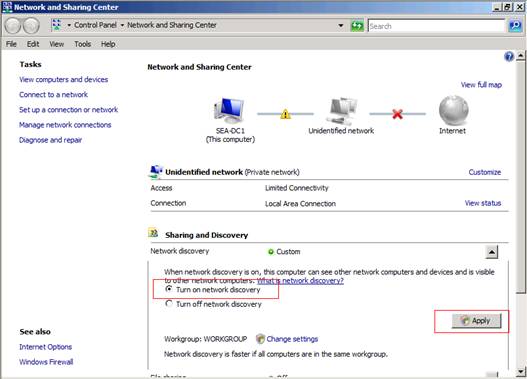
然後打開network discovery功能
如下圖(
)所示
From:http://tw.wingwit.com/Article/Common/201311/4834.html