Visual Studio正式發布後吸引了大量的編程人員為了由原來的Visual Studio轉換為最新的Visual Studio不少公司也重新配置了計算機硬件設備從而得以正常平穩的使用最新的開發工具Visual Studio在一些特性上也做出了許多的改進訪問注冊表以及系統內核也變得更為方便了本文主要以Visual Studio 當中的VBnet語言介紹兩實用的列子
打開 Visual Studio 在文件 (File) 菜單上單擊新建項目 (New Project) 在新建項目 (New Project) 對話框的模板 (Templates) 窗格中單擊 Windows 應用程序(Windows Application)單擊確定 (OK) 如圖
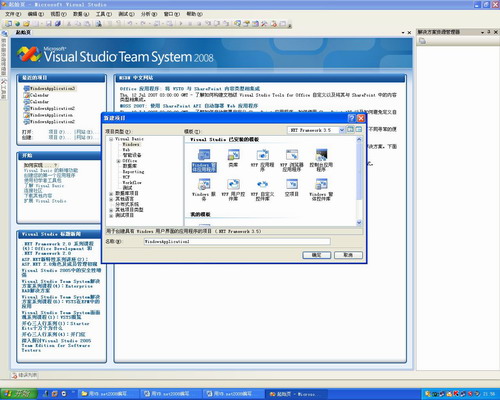
圖
選擇Form窗體在Form窗體中添加如下控件
個按鈕控件分別為ButtonButtonButton 一個Textbox控件Label控件
控件屬性設置如下

在這裡我們以修改IE標題為實例來讀取與修改注冊表當中的值控件添加完後界面進行適當的調整如圖
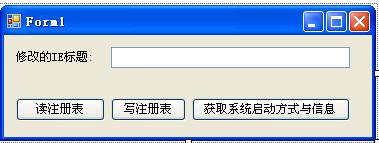
圖
在訪問注冊表的時候我們需要使用Registry 類以下是Registry 類的詳細信息
名稱Registry 類
CurrentUser
存儲有關用戶首選項的信息
LocalMachine
存儲本地計算機的配置信息
ClassesRoot
存儲有關類型(和類)及其屬性的信息
Users
存儲有關默認用戶配置的信息
PerformanceData
存儲軟件組件的性能信息
CurrentConfig
存儲非用戶特定的硬件信息
DynData
存儲動態數據
Registry 類還包含從注冊表項設置和檢索值的 staticGetValue 和 SetValue 方法每次使用這兩種方法時它們都會打開和關閉注冊表項所以當訪問大量值時還可以使用RegistryKey 類中的類似方法RegistryKey 類還提供了可用來為注冊表項設置 Windows 訪問控制安全性的方法可用來在檢索值之前測試值的數據類型的方法以及刪除項的方法
訪問注冊表時我們還需要用到RegistryKeyOpenSubKey 方法
RegistryKey
OpenSubKey 方法 (String
RegistryKeyPermissionCheck
RegistryRights)

進入代碼編輯窗口
進入Button_Click事件

進入Button_Click事件

讀寫注冊表的代碼已經輸入完畢了接下來我們怎樣獲取系統信息呢?要獲取系統信息我們需要使用SystemInformation 類有關SystemInformation 類的詳細信息如下
先為大家介紹SystemInformation 類的 BootMode枚舉我們這個實例主要以BootMode枚舉為例
SystemInformation 類的 BootMode枚舉

SystemInformation 成員的屬性 非常關鍵大家需要了解相關的屬性等信息(包括了大量獲取系統信息一些方法)
SystemInformation 成員的屬性


進入代碼編輯器模式
進入Button_Click事件

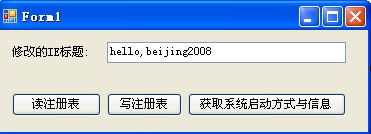
好了代碼輸入完成接下來我們需要進行程序測試了在文本框中輸入你想要輸入的信息如圖
圖
我們可以打開IE浏覽器看一下效果:
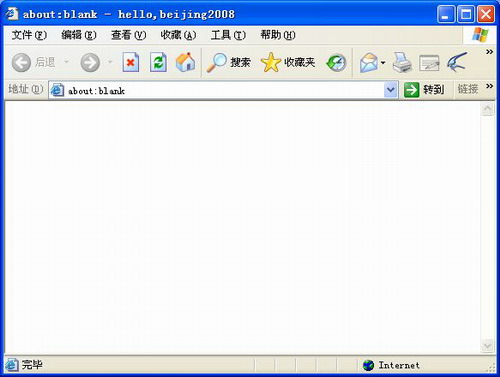
圖
隨後我們可以單擊<獲取系統啟動方式與信息>按鈕測試結果如圖所示
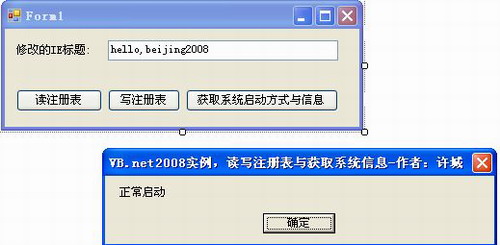
圖
好了以上所有功能運行成功這兩個實例非常的實用希望大家能夠多去了解有關這方面的知識萬變不離其中
From:http://tw.wingwit.com/Article/program/net/201311/14998.html